How to Sprout Grains for Sourdough Bread
How to Sprout Grains (and make sprouted grain sourdough bread)
by Jenny at www.instructables.com
Sprouted grain flour is a staple in my kitchen. I make it from time to time, in bulk, and freeze it for use in sweet things like these sprouted grain cookies, or in this sprouted bread with milk and honey. Sprouting sweetens grains naturally, and the process also helps to mitigate the effects of antinutrients like phytic acid which are found in whole grains. It release a bit of the plant, one that’s imprisoned in the grain’s tough layer of bran. When the conditions are right – moist and slightly acidic – the little plant begins to emerge, if only slightly. It’s a beautiful transformation, the release of life from something so small and so seemingly inactive.
Why Sprouted Grain Flour
All whole grains (and beans, seeds and nuts) promise an array of vitamins, minerals and dietary fiber which is why health authorities (rightly, or wrongly, you might think) emphasize them as a source of good health. And, despite all the emphasis on whole-grain this and whole-grain that, what they fail to emphasize is that these whole grains are also a source of antinutrients -substances that actually prevent you from fully absorbing the nutrients whole grains contain. Listen closely now: you might eat as many whole grains as you like, but without proper preparation to mitigate the effect of these antinutrients, you are not reaping the rewards you should.
Grains want tender, long and thoughtful cooking. This means grains need to be treated first to release their full array of nutrients to your body. Soaking, sprouting and souring accomplish that goal which is also why I emphasize sourdough baking at Nourished Kitchen. Now, sprouting won’t remove all of the antinutrients in the grain – but it has some effect. To remove them all, you need to mill the grains and extract all the bran, but sprouting does accomplish quite a bit not only to release the existing minerals from the grain, but to improve its complement of vitamins and protein.
Which grains can I sprout?
You can sprout any grain, provided you’re working from the whole grain berry, not a rolled, flaked or otherwise damaged grain. Wheat, spelt, oats, barley and einkorn all work well for sprouting. Oats are a high-fat grain, and are often treated with steam or heat and dried prior to packing and distribution, so if you wish to sprout oats, take care to purchase untreated oat groats intended specifically for sprouting.
Where to Find Grains for Sprouting
In most cases you’ll be able to purchase whole grain berries at your local health food store in the bulk bins. Common grains like spelt, wheat and rye are available at even the smallest stores; however, untreated oats for sprouting and einkorn berries are less commonly available. For my family, I purchase both einkorn berries and sprouting oats online.
- Common Grains (Spelt, Rye, Wheat, Rice): Check your local health food store’s bulk bins, or inquire at your buying club.
- Einkorn Berries: Are not widely available yet; however, you can purchase them online at affordable rates on often receive free shipping (see sources).
- Untreated Sprouting Oats: Are not widely available yet, as most oats on the market have been heat-treated due to the volatile nature of their oils. I purchase organic sprouting oats online here.
Sprouting Grains for Flour
When sprouting grains to make sprouted grain flour, you must be mindful of the time it takes to sprout while not allowing your sprouts to grow too large. Certainly, once that little speck of a root appears at the end of the grain, it’s tempting to let it continue growing. Yet, by allowing the sprout to continue to grow, you run the risk of malting the grains. Malt, in small amounts, adds great depth of flavor to baked goods; however, when used exclusively or in large amounts it will produce an overly sweet, gooey bread that never cooks through. In using sprouted grains for flour, be mindful to begin dehydrating the grains shortly after the root tip appears.
Sprouted grains should also be dried at a relatively low temperature in a dehydrator; just as allowing the sprout to grow too long can fundamentally change the way the flour performs, so too can drying it at a high temperature. An oven doesn’t work well as a substitute for a dehydrator in this instance.
Equipment You’ll Need for Making Sprouted Grain Flour
I live in a very small, modest home with a surprisingly tiny, equally modest kitchen – about 40 square feet. I do not like to clutter what little space I enjoy with too many appliances and kitchen gadgets; however, there’s a few items I find to be absolute necessities for sprouted flour making. Fortunately, they all serve multiple purposes.
- The Insert of My Slowcooker: I soak my grains in the insert of my slowcooker, though any large mixing bowl will work well. I use this slowcooker.
- Fine-mesh Sieve: I use a fine-mesh sieve that fits over the sink for rinsing and aerating the grains as they sprout. This is the sieve I use. Fitting it over the sink saves much-needed counter space, and also allows the water to run cleanly through the grains, minimizing clean up.
- Dehydrator: To prevent sprouted grains from roasting in the oven at too high a temperature, I dry them in a food dehydrator. I have a 9-tray dehydrator that I also use to preserve the summer and autumn harvest, to help bread rise and to keep a constant temperature for yogurt making. I also make sure to use Paraflexx sheets which keep the grains from slipping through the holes in the dehydrator’s trays.
- Grain Grinder: When I first began grinding my own grains for flour, I used a Nutrimill; however, early this year it stopped working, and I purchased a Komo Grain Grinder and Grain Flaker which is blessedly quiet and doesn’t heat the flour during grinding. There are many grain grinders, electric and manual, in a variety of price ranges. You can check out this resource to determine which meets your needs the best.
Where to Find Sprouted Grain Flour
If you haven’t the interest or time to sprout your own grains for sprouted grain flour, you can also purchase sprouted grain flour online (you can find it here), as well as in some large health food stores. For many people who have neither the time, space or desire to make their own sprouted grains and flours, purchasing organic sprouted flour is often the best option.

Sprouted grain flour is rich in nutrients, particularly B vitamins like folate. You can substitute it at 1:1 ratio for any whole grain flour, and is particularly good in baked goods, cookies and breads.
Ingredients
- 1 pound whole grain (such as rice, wheat berries, einkorn berries, spelt berries etc.)
- 1 tablespoon vinegar
Instructions
- Pour the grains into a large mixing bowl, and cover with warm water by 2 inches. Stir in the vinegar, cover the bowl, and set it on the counter. Let the grains soak, undisturbed, for 18 to 24 hours, then drain the grains and rinse them well.
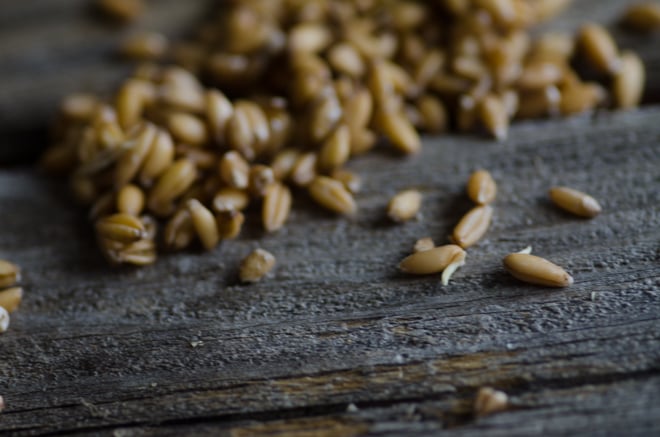
- Pour the grains into an over-the-sink fine-mesh sieve (like this one), and rinse them under flowing water. Stir the grains with your hands. Twice a day for 2 to 3 days, continue rinsing and stirring the grains, a tiny, cream-colored sprout emerges at the end of the grains.
- Transfer the grains to dehydrator trays lined with a non-stick sheets (find them here). Dehydrate the grains for 12 to 18 hours. Once the grains are firm and dry, transfer them to the freezer or grind them in a grain grinder (find them here). Grind them to a fine flour, sift it, as desired, and store it in the freezer until ready to use.
http://nourishedkitchen.com/how-to-make-sprouted-grain-flour/